Opas: Ristinolla
Tulet rakentamaan pienen ristinolla-pelin tässä oppaassa. Tämä opas ei oleta aikaisempaa React-osaamista. Tekniikat, joita opit oppaan aikana ovat perustavanlaatuisia mille tahansa React-sovellukselle ja niiden ymmärtäminen antaa sinulle syvällisen ymmärryksen Reactista.
Tämä opas on jaettu useaan osaan:
- Oppaan asennusvaihe antaa sinulle lähtökohdan* oppaan seuraamiseen.
- Yleiskatsaus opettaa sinulle Reactin perusteet: komponentit, propsit, ja tilan.
- Pelin viimeistely opettaa sinulle yleisimmät tekniikat React kehityksessä.
- Aikamatkustuksen lisääminen opettaa sinulle syvällisen ymmärryksen Reactin uniikkeihin vahvuuksiin.
Mitä olet rakentamassa?
Tässä oppaassa tulet rakentamaan interaktiivisen ristinolla-pelin Reactilla.
Näet alla miltä se tulee lopulta näyttämään kun saat sen valmiiksi:
import { useState } from 'react';

function Square({ value, onSquareClick }) {
  return (
    <button className="square" onClick={onSquareClick}>
      {value}
    </button>
  );
}

function Board({ xIsNext, squares, onPlay }) {
  function handleClick(i) {
    if (calculateWinner(squares) || squares[i]) {
      return;
    }
    const nextSquares = squares.slice();
    if (xIsNext) {
      nextSquares[i] = 'X';
    } else {
      nextSquares[i] = 'O';
    }
    onPlay(nextSquares);
  }

  const winner = calculateWinner(squares);
  let status;
  if (winner) {
    status = 'Winner: ' + winner;
  } else {
    status = 'Next player: ' + (xIsNext ? 'X' : 'O');
  }

  return (
    <>
      <div className="status">{status}</div>
      <div className="board-row">
        <Square value={squares[0]} onSquareClick={() => handleClick(0)} />
        <Square value={squares[1]} onSquareClick={() => handleClick(1)} />
        <Square value={squares[2]} onSquareClick={() => handleClick(2)} />
      </div>
      <div className="board-row">
        <Square value={squares[3]} onSquareClick={() => handleClick(3)} />
        <Square value={squares[4]} onSquareClick={() => handleClick(4)} />
        <Square value={squares[5]} onSquareClick={() => handleClick(5)} />
      </div>
      <div className="board-row">
        <Square value={squares[6]} onSquareClick={() => handleClick(6)} />
        <Square value={squares[7]} onSquareClick={() => handleClick(7)} />
        <Square value={squares[8]} onSquareClick={() => handleClick(8)} />
      </div>
    </>
  );
}

export default function Game() {
  const [history, setHistory] = useState([Array(9).fill(null)]);
  const [currentMove, setCurrentMove] = useState(0);
  const xIsNext = currentMove % 2 === 0;
  const currentSquares = history[currentMove];

  function handlePlay(nextSquares) {
    const nextHistory = [...history.slice(0, currentMove + 1), nextSquares];
    setHistory(nextHistory);
    setCurrentMove(nextHistory.length - 1);
  }

  function jumpTo(nextMove) {
    setCurrentMove(nextMove);
  }

  const moves = history.map((squares, move) => {
    let description;
    if (move > 0) {
      description = 'Go to move #' + move;
    } else {
      description = 'Go to game start';
    }
    return (
      <li key={move}>
        <button onClick={() => jumpTo(move)}>{description}</button>
      </li>
    );
  });

  return (
    <div className="game">
      <div className="game-board">
        <Board xIsNext={xIsNext} squares={currentSquares} onPlay={handlePlay} />
      </div>
      <div className="game-info">
        <ol>{moves}</ol>
      </div>
    </div>
  );
}

function calculateWinner(squares) {
  const lines = [
    [0, 1, 2],
    [3, 4, 5],
    [6, 7, 8],
    [0, 3, 6],
    [1, 4, 7],
    [2, 5, 8],
    [0, 4, 8],
    [2, 4, 6],
  ];
  for (let i = 0; i < lines.length; i++) {
    const [a, b, c] = lines[i];
    if (squares[a] && squares[a] === squares[b] && squares[a] === squares[c]) {
      return squares[a];
    }
  }
  return null;
}
Jos et saa selvää koodista vielä taikka koodin syntaksi ei ole tuttua, älä huoli! Tämän oppaan tavoite on auttaa sinua ymmärtämään Reactia ja sen syntaksia.
Suosittelemme, että kokeilet peliä ennen kuin jatkat oppaan kanssa. Yksi pelin ominaisuuksista on, että pelilaudan oikealla puolella on numeroitu lista. Tämä lista näyttää pelin kaikki siirrot ja päivittyy pelin edetessä.
Kun olet pelannut peliä, jatka oppaan kanssa. Tulet aloittamaan yksinkertaisemmasta pohjasta. Seuraava askel on asentaa ympäristö, jotta voit aloittaa pelin rakentamisen.
Oppaan asennusvaihe
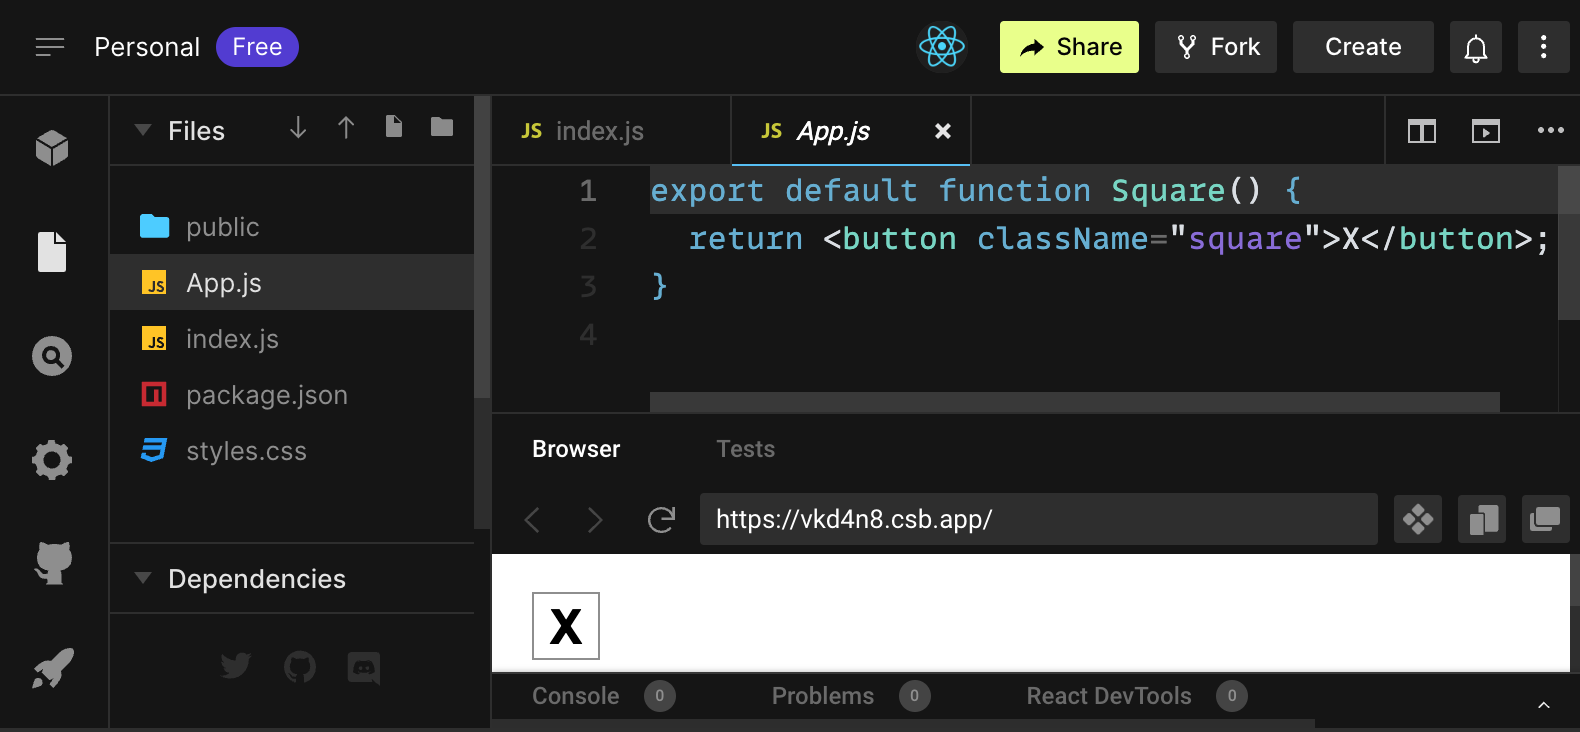
Alla olevassa koodieditorissa, paina *Forkkaa oikeassa yläreunassa avataksesi editorin uuteen välilehteen käyttäen CodeSandboxia. CodeSandbox antaa sinun kirjoittaa koodia selaimessasi ja esikatsella miten käyttäjäsi näkevät luomasi sovelluksen. Uuden välilehden tulisi näyttää tyhjä ruutu ja tämän oppaan aloituskoodi.
export default function Square() {
  return <button className="square">X</button>;
}
Yleiskatsaus
Nyt kun olet valmis, annetaan yleiskatsaus Reactista!
Aloituskoodin tarkastelu
CodeSandboxissa näet kolme eri osiota:
- Files osio, jossa on listaus tiedostoista kuten
App.js,index.js,styles.cssja hakemisto nimeltäänpublic - Koodieditori, jossa näet valitun tiedoston lähdekoodin
- Selain, jossa näet miltä kirjoittamasi koodi näyttää
App.js tiedoston tulisi olla valittuna Files osiossa. Tiedoston sisältö koodieditorissa tulisi olla seuraava:
export default function Square() {
return <button className="square">X</button>;
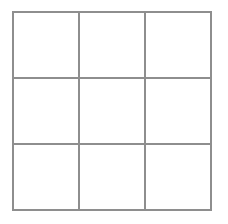
}Selaimen tulisi näyttää neliö, jossa on X:

Katsotaan nyt aloituskoodin tiedostoja.
App.js
Koodi App.js tiedostossa luo komponentin. Reactissa komponentti on pala uudelleenkäytettävää koodia, joka edustaa palan käyttöliittymää. Komponentteja käytetään renderöimään, hallitsemaan ja päivittämään sovelluksesi UI elementtejä. Katsotaan komponenttia rivi riviltä nähdäksemme mitä tapahtuu:
export default function Square() {
  return <button className="square">X</button>;
}
Ensimmäinen rivi määrittelee funktion nimeltään Square. export -JavaScript avainsana tekee funktion saavutettavaksi tämän tiedoston ulkopuolelle. default avainsana kertoo muille tiedostoille, että tämä on pääfunktio tiedostossasi.
export default function Square() {
  return <button className="square">X</button>;
}
Seuraava koodirivi palauttaa painonapin. return -JavaScript avainsanan tarkoittaa, mitä ikinä sen jälkeen tulee, palautetaan se arvo funktion kutsujalle. <button> on JSX elementti. JSX elementti on yhdistelmä JavaScript koodia ja HTML tageja, jotka kuvaavat mitä haluaisit näyttää. className="square" on painikkeen ominaisuus taikka propsi, joka ekertoo CSS:lle miten painike tulisi tyylittää. X on teksti, joka näytetään painikkeen sisällä, ja </button> sulkee JSX elementin osoittaen, että mitään seuraavaa sisältöä ei tulisi sijoittaa painikkeen sisälle.
styles.css
Paina tiedostosta nimeltään styles.css CodeSandboxin Files osiossa. Tämä tiedosto määrittelee React sovelluksesi tyylin. Ensimmäiset kaksi CSS selektoria (* ja body) määrittävät suuren osan sovelluksestasi tyyleistä, kun taas .square selektori määrittää minkä tahansa komponentin tyylin, jossa className ominaisuus on asetettu square arvoon. Koodissasi tämä vastaa painiketta Square komponentissa App.js tiedostossa.
index.js
Paina tiedostosta nimeltään index.js CodeSandboxin Files osiossa. Et tule muokkaamaan tätä tiedostoa oppaan aikana, mutta se on silta App.js tiedostossa luomasi komponentin ja selaimen välillä.
import { StrictMode } from 'react';
import { createRoot } from 'react-dom/client';
import './styles.css';

import App from './App';
Rivit 1-5 tuovat kaikki tarvittavat palaset yhteen:
- React
- Reactin kirjasto, jolla se juttelee selaimen kanssa (React DOM)
- komponenttiesi tyylit
- luomasi komponentti
App.jstiedostossa.
Loput tiedostosta tuo kaikki palaset yhteen ja palauttaa lopputuotteen index.html tiedostoon public hakemistossa.
Pelilaudan rakentaminen
Palataan takaisin App.js tiedostoon. Tämä on missä tulet viettämään lopun oppaan ajasta.
Nykyisillään pelilauta on vain yksi neliö, mutta tarvitset yhdeksän! Voit yrittää vain kopioida ja liittää neliösi tehdäksesi kaksi neliötä näin:
export default function Square() {
  return <button className="square">X</button><button className="square">X</button>;
}
Saat tämän virheen:
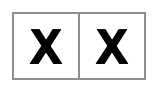
<>...</>?React komponenttien täytyy palauttaa yksi JSX elementti, ei useampia vierekkäisiä JSX elementtejä kun kaksi painonappia. Korjataksesi tämän käytä fragmenttejä (<> ja </>) käärimään useampia vierekkäisiä JSX elementtejä näin:
export default function Square() {
  return (
    <>
      <button className="square">X</button>
      <button className="square">X</button>
    </>
  );
}
Nyt näet:
Hyvä! Nyt sinun tulee kopioida ja littää muutaman kerran saadaksesi yhdeksän neliötä ja sitten…

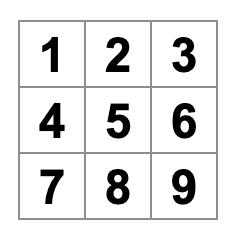
Voi ei! Neliöt ovat kaikki yhdessä rivissä eikä ruudukossa kuten tarvitset sen pelilaudalla. Korjataksesi tämän sinun tulee ryhmitellä neliöt riveihin div elementeillä ja lisätä muutama CSS luokka. Samalla kun teet tämän, annat jokaiselle neliölle numeron varmistaaksesi, että tiedät missä jokainen neliö näytetään.
App.js tiedostossa, päivitä Square komponentti näyttämään tältä:
export default function Square() {
  return (
    <>
      <div className="board-row">
        <button className="square">1</button>
        <button className="square">2</button>
        <button className="square">3</button>
      </div>
      <div className="board-row">
        <button className="square">4</button>
        <button className="square">5</button>
        <button className="square">6</button>
      </div>
      <div className="board-row">
        <button className="square">7</button>
        <button className="square">8</button>
        <button className="square">9</button>
      </div>
    </>
  );
}
styles.css tiedostossa määritelty CSS tyylittää divit className:n board-row arvolla. Nyt kun olet ryhmitellyt komponenttisi riveihin tyylitetyillä div elementeillä, sinulla on ristinolla-pelilauta:
Mutta nyt sinulla on ongelma. Komponenttisi Square ei enää ole neliö. Korjataksesi tämän, muuta nimi Square komponentille Board:iksi:
export default function Board() {
  //...
}
Tässä kohtaa, koodisi tuli näyttää tämänkaltaiselta:
export default function Board() {
  return (
    <>
      <div className="board-row">
        <button className="square">1</button>
        <button className="square">2</button>
        <button className="square">3</button>
      </div>
      <div className="board-row">
        <button className="square">4</button>
        <button className="square">5</button>
        <button className="square">6</button>
      </div>
      <div className="board-row">
        <button className="square">7</button>
        <button className="square">8</button>
        <button className="square">9</button>
      </div>
    </>
  );
}
Datan välittäminen propseilla
Seuraavaksi haluat muuttaa neliön arvon tyhjästä X:ksi kun käyttäjä painaa neliötä. Tällä hetkellä sinun täytyisi kopioida ja liittää koodi, joka päivittää neliön yhdeksän kertaa (kerran jokaiselle neliölle)! Sen sijaan, että kopioisit ja liittäisit, Reactin komponenttiarkkitehtuuri antaa sinun luoda uudelleenkäytettävän komponentin välttääksesi sotkuisen, toistuvan koodin.
Ensiksi, kopioit rivin, joka määrittelee ensimmäisen neliösi (<button className="square">1</button>) Board komponentistasi uuteen Square komponenttiin:
function Square() {
  return <button className="square">1</button>;
}

export default function Board() {
  // ...
}
Sitten päivität Board komponentin renderöimään sen Square komponentin käyttäen JSX syntaksia:
// ...
export default function Board() {
  return (
    <>
      <div className="board-row">
        <Square />
        <Square />
        <Square />
      </div>
      <div className="board-row">
        <Square />
        <Square />
        <Square />
      </div>
      <div className="board-row">
        <Square />
        <Square />
        <Square />
      </div>
    </>
  );
}
Huomaa miten toisin kuin selainten div:it, omat komponenttisi Board ja Square täytyy alkaa isolla kirjaimella.
Katsotaanpa:

Voi ei! Menetit numeroidut neliöt, jotka sinulla oli aiemmin. Nyt jokaisessa neliössä lukee “1”. Korjataksesi tämän, käytä propseja välittääksesi arvon, jonka jokaisen neliön tulisi saada vanhemmalta komponentilta (Board) sen alakomponentille (Square).
Päivitä Square komponentti lukemaan value propsi, jonka välität Board komponentilta:
function Square({ value }) {
  return <button className="square">1</button>;
}
function Square({ value }) kertoo, että Square komponentille voidaan välittää value niminen propsi.
Nyt haluat näyttää value arvon 1:n sijaan jokaisessa neliössä. Kokeile tehdä se näin:
function Square({ value }) {
  return <button className="square">value</button>;
}
Oho, tämä ei ollut mitä halusit:
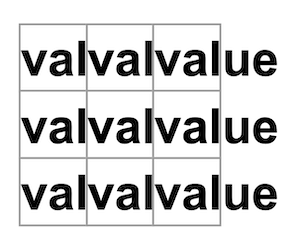
Halusit renderöidä JavaScript muuttujan nimeltään value komponentistasi, et sanan “value”. Päästäksesi “takaisin JavaScriptiin” JSX:stä, tarvitset aaltosulkeet. Lisää aaltosulkeet value:n ympärille JSX:ssä näin:
function Square({ value }) {
  return <button className="square">{value}</button>;
}
Toistaiseksi, sinun tulisi nähdä tyhjä pelilauta:
Näin tapahtuu, koska Board komponentti ei ole välittänyt value propseja jokaiselle Square komponentille, jonka se renderöi. Korjataksesi tämän, lisää value propsi jokaiselle Square komponentille, jonka Board komponentti renderöi:
export default function Board() {
  return (
    <>
      <div className="board-row">
        <Square value="1" />
        <Square value="2" />
        <Square value="3" />
      </div>
      <div className="board-row">
        <Square value="4" />
        <Square value="5" />
        <Square value="6" />
      </div>
      <div className="board-row">
        <Square value="7" />
        <Square value="8" />
        <Square value="9" />
      </div>
    </>
  );
}
Nyt sinun tulisi nähdä numeroitu ruudukko taas:
Päivitetyn koodisi tulisi näyttää tämänkaltaiselta:
function Square({ value }) {
  return <button className="square">{value}</button>;
}

export default function Board() {
  return (
    <>
      <div className="board-row">
        <Square value="1" />
        <Square value="2" />
        <Square value="3" />
      </div>
      <div className="board-row">
        <Square value="4" />
        <Square value="5" />
        <Square value="6" />
      </div>
      <div className="board-row">
        <Square value="7" />
        <Square value="8" />
        <Square value="9" />
      </div>
    </>
  );
}
Interaktiivisen komponentin luominen
Täytetään Square komponentti X:llä kun klikkaat sitä. Määritä funktio nimeltään handleClick Square komponentin sisällä. Sitten, lisää onClick prosi painonapin JSX elementtiin, joka palautetaan Square komponentista:
function Square({ value }) {
  function handleClick() {
    console.log('clicked!');
  }

  return (
    <button
      className="square"
      onClick={handleClick}
    >
      {value}
    </button>
  );
}
Jos painat neliöstä nyt, sinun tulisi nähdä loki, jossa lukee "clicked!" Console välilehdellä Browser osiossa CodeSandboxissa. Painamalla neliötä useammin kuin kerran, lokiin tulee uusi rivi, jossa lukee "clicked!". Toistuvat lokit samalla viestillä eivät luo uusia rivejä lokiin. Sen sijaan, näet kasvavan laskurin ensimmäisen "clicked!" lokin vieressä.
Seuraavaksi, haluat Square komponentin “muistavat”, että sitä painettiin, ja täyttää sen “X” merkillä. Komponentit käyttävät tilaa muistaakseen asioita.
React tarjoaa erityisen funktion nimeltään useState, jota voit kutsua komponentistasi, jotta se “muistaa” asioita. Tallennetaan Square komponentin nykyinen arvo tilaan ja muutetaan sitä, kun Square painetaan.
Importtaa useState tiedoston ylläosassa. Poista value propsi Square komponentista. Sen sijaan, lisää uusi rivi Square komponentin alkuun, joka kutsuu useState:a. Anna sen palauttaa tilamuuttuja nimeltään value:
import { useState } from 'react';

function Square() {
  const [value, setValue] = useState(null);

  function handleClick() {
    //...
value pitää sisällään arvon ja setValue on funktio, jota voidaan käyttää muuttamaan arvoa. null, joka välitetään useState:lle, käytetään alkuperäisenä arvona tälle tilamuuttujalle, joten value on aluksi null.
Koska Square komponentti ei enää hyväksy propseja, poistat value propin kaikista yhdeksästä Square komponentista, jotka Board komponentti luo:
// ...
export default function Board() {
  return (
    <>
      <div className="board-row">
        <Square />
        <Square />
        <Square />
      </div>
      <div className="board-row">
        <Square />
        <Square />
        <Square />
      </div>
      <div className="board-row">
        <Square />
        <Square />
        <Square />
      </div>
    </>
  );
}
Nyt muutat Square:n näyttämään “X”:n kun sitä painetaan. Korvaa console.log("clicked!"); tapahtumankäsittelijä setValue('X');:lla. Nyt Square komponenttisi näyttää tältä:
function Square() {
  const [value, setValue] = useState(null);

  function handleClick() {
    setValue('X');
  }

  return (
    <button
      className="square"
      onClick={handleClick}
    >
      {value}
    </button>
  );
}
Kutsumalla set funktiota onClick käsittelijästä, kerrot Reactille renderöidä Square:n uudelleen aina kun sen <button>:ia painetaan. Päivityksen jälkeen, Squaren value on 'X', joten näet “X”:n pelilaudalla. Paina mitä tahansa neliötä, ja “X”:n tulisi näkyä:
Jokaisella Squarella on sen oma tila: value joka on tallennettu jokaisessa Squaressa on täysin riippumaton muista. Kun kutsut set funktiota komponentissa, React päivittää automaattisesti myös alakomponentit.
Kun olet tehnyt yllä olevat muutokset, koodisi tulisi näyttää tältä:
import { useState } from 'react';

function Square() {
  const [value, setValue] = useState(null);

  function handleClick() {
    setValue('X');
  }

  return (
    <button
      className="square"
      onClick={handleClick}
    >
      {value}
    </button>
  );
}

export default function Board() {
  return (
    <>
      <div className="board-row">
        <Square />
        <Square />
        <Square />
      </div>
      <div className="board-row">
        <Square />
        <Square />
        <Square />
      </div>
      <div className="board-row">
        <Square />
        <Square />
        <Square />
      </div>
    </>
  );
}
React kehitystyökalut
React kehitystyökalujen avulla voit tarkastella React komponenttiesi propseja ja tilaa. React DevTools välilehti löytyy browser osion alapuolelta CodeSandboxissa:
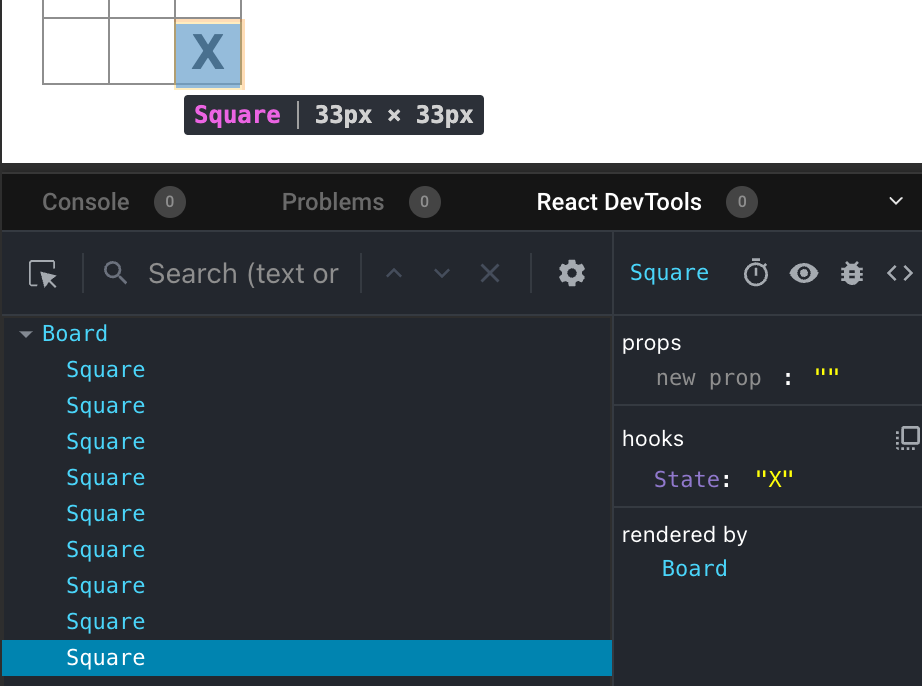
Tarkastellaksesi tiettyä komponenttia ruudulla, käytä nappia React DevToolsin vasemmassa yläkulmassa:
Pelin viimeistely
Tähän mennessä, sinulla on kaikki peruspalikat ristinolla-peliisi. Saadaksesi täydellisen pelin, sinun täytyy nyt vuorotella “X”:n ja “O”:n laittamista pelilaudalle, ja sinun täytyy keksiä tapa määrittää voittaja.
Tilan nostaminen ylös
Currently, each Square component maintains a part of the game’s state. To check for a winner in a tic-tac-toe game, the Board would need to somehow know the state of each of the 9 Square components.
How would you approach that? At first, you might guess that the Board needs to “ask” each Square for that Square’s state. Although this approach is technically possible in React, we discourage it because the code becomes difficult to understand, susceptible to bugs, and hard to refactor. Instead, the best approach is to store the game’s state in the parent Board component instead of in each Square. The Board component can tell each Square what to display by passing a prop, like you did when you passed a number to each Square.
To collect data from multiple children, or to have two child components communicate with each other, declare the shared state in their parent component instead. The parent component can pass that state back down to the children via props. This keeps the child components in sync with each other and with their parent.
Lifting state into a parent component is common when React components are refactored.
Let’s take this opportunity to try it out. Edit the Board component so that it declares a state variable named squares that defaults to an array of 9 nulls corresponding to the 9 squares:
// ...
export default function Board() {
  const [squares, setSquares] = useState(Array(9).fill(null));
  return (
    // ...
  );
}
Array(9).fill(null) creates an array with nine elements and sets each of them to null. The useState() call around it declares a squares state variable that’s initially set to that array. Each entry in the array corresponds to the value of a square. When you fill the board in later, the squares array will look like this:
['O', null, 'X', 'X', 'X', 'O', 'O', null, null]Now your Board component needs to pass the value prop down to each Square that it renders:
export default function Board() {
  const [squares, setSquares] = useState(Array(9).fill(null));
  return (
    <>
      <div className="board-row">
        <Square value={squares[0]} />
        <Square value={squares[1]} />
        <Square value={squares[2]} />
      </div>
      <div className="board-row">
        <Square value={squares[3]} />
        <Square value={squares[4]} />
        <Square value={squares[5]} />
      </div>
      <div className="board-row">
        <Square value={squares[6]} />
        <Square value={squares[7]} />
        <Square value={squares[8]} />
      </div>
    </>
  );
}
Next, you’ll edit the Square component to receive the value prop from the Board component. This will require removing the Square component’s own stateful tracking of value and the button’s onClick prop:
function Square({value}) {
  return <button className="square">{value}</button>;
}
At this point you should see an empty tic-tac-toe board:
And your code should look like this:
import { useState } from 'react';

function Square({ value }) {
  return <button className="square">{value}</button>;
}

export default function Board() {
  const [squares, setSquares] = useState(Array(9).fill(null));
  return (
    <>
      <div className="board-row">
        <Square value={squares[0]} />
        <Square value={squares[1]} />
        <Square value={squares[2]} />
      </div>
      <div className="board-row">
        <Square value={squares[3]} />
        <Square value={squares[4]} />
        <Square value={squares[5]} />
      </div>
      <div className="board-row">
        <Square value={squares[6]} />
        <Square value={squares[7]} />
        <Square value={squares[8]} />
      </div>
    </>
  );
}
Each Square will now receive a value prop that will either be 'X', 'O', or null for empty squares.
Next, you need to change what happens when a Square is clicked. The Board component now maintains which squares are filled. You’ll need to create a way for the Square to update the Board’s state. Since state is private to a component that defines it, you cannot update the Board’s state directly from Square.
Instead, you’ll pass down a function from the Board component to the Square component, and you’ll have Square call that function when a square is clicked. You’ll start with the function that the Square component will call when it is clicked. You’ll call that function onSquareClick:
function Square({ value }) {
  return (
    <button className="square" onClick={onSquareClick}>
      {value}
    </button>
  );
}
Next, you’ll add the onSquareClick function to the Square component’s props:
function Square({ value, onSquareClick }) {
  return (
    <button className="square" onClick={onSquareClick}>
      {value}
    </button>
  );
}
Now you’ll connect the onSquareClick prop to a function in the Board component that you’ll name handleClick. To connect onSquareClick to handleClick you’ll pass a function to the onSquareClick prop of the first Square component:
export default function Board() {
  const [squares, setSquares] = useState(Array(9).fill(null));

  return (
    <>
      <div className="board-row">
        <Square value={squares[0]} onSquareClick={handleClick} />
        //...
  );
}
Lastly, you will define the handleClick function inside the Board component to update the squares array holding your board’s state:
export default function Board() {
  const [squares, setSquares] = useState(Array(9).fill(null));

  function handleClick() {
    const nextSquares = squares.slice();
    nextSquares[0] = "X";
    setSquares(nextSquares);
  }

  return (
    // ...
  )
}
The handleClick function creates a copy of the squares array (nextSquares) with the JavaScript slice() Array method. Then, handleClick updates the nextSquares array to add X to the first ([0] index) square.
Calling the setSquares function lets React know the state of the component has changed. This will trigger a re-render of the components that use the squares state (Board) as well as its child components (the Square components that make up the board).
Now you can add X’s to the board… but only to the upper left square. Your handleClick function is hardcoded to update the index for the upper left square (0). Let’s update handleClick to be able to update any square. Add an argument i to the handleClick function that takes the index of the square to update:
export default function Board() {
  const [squares, setSquares] = useState(Array(9).fill(null));

  function handleClick(i) {
    const nextSquares = squares.slice();
    nextSquares[i] = "X";
    setSquares(nextSquares);
  }

  return (
    // ...
  )
}
Next, you will need to pass that i to handleClick. You could try to set the onSquareClick prop of square to be handleClick(0) directly in the JSX like this, but it won’t work:
<Square value={squares[0]} onSquareClick={handleClick(0)} />Here is why this doesn’t work. The handleClick(0) call will be a part of rendering the board component. Because handleClick(0) alters the state of the board component by calling setSquares, your entire board component will be re-rendered again. But this runs handleClick(0) again, leading to an infinite loop:
Why didn’t this problem happen earlier?
When you were passing onSquareClick={handleClick}, you were passing the handleClick function down as a prop. You were not calling it! But now you are calling that function right away—notice the parentheses in handleClick(0)—and that’s why it runs too early. You don’t want to call handleClick until the user clicks!
You could fix this by creating a function like handleFirstSquareClick that calls handleClick(0), a function like handleSecondSquareClick that calls handleClick(1), and so on. You would pass (rather than call) these functions down as props like onSquareClick={handleFirstSquareClick}. This would solve the infinite loop.
However, defining nine different functions and giving each of them a name is too verbose. Instead, let’s do this:
export default function Board() {
  // ...
  return (
    <>
      <div className="board-row">
        <Square value={squares[0]} onSquareClick={() => handleClick(0)} />
        // ...
  );
}
Notice the new () => syntax. Here, () => handleClick(0) is an arrow function, which is a shorter way to define functions. When the square is clicked, the code after the => “arrow” will run, calling handleClick(0).
Now you need to update the other eight squares to call handleClick from the arrow functions you pass. Make sure that the argument for each call of the handleClick corresponds to the index of the correct square:
export default function Board() {
  // ...
  return (
    <>
      <div className="board-row">
        <Square value={squares[0]} onSquareClick={() => handleClick(0)} />
        <Square value={squares[1]} onSquareClick={() => handleClick(1)} />
        <Square value={squares[2]} onSquareClick={() => handleClick(2)} />
      </div>
      <div className="board-row">
        <Square value={squares[3]} onSquareClick={() => handleClick(3)} />
        <Square value={squares[4]} onSquareClick={() => handleClick(4)} />
        <Square value={squares[5]} onSquareClick={() => handleClick(5)} />
      </div>
      <div className="board-row">
        <Square value={squares[6]} onSquareClick={() => handleClick(6)} />
        <Square value={squares[7]} onSquareClick={() => handleClick(7)} />
        <Square value={squares[8]} onSquareClick={() => handleClick(8)} />
      </div>
    </>
  );
};
Now you can again add X’s to any square on the board by clicking on them:
But this time all the state management is handled by the Board component!
This is what your code should look like:
import { useState } from 'react';

function Square({ value, onSquareClick }) {
  return (
    <button className="square" onClick={onSquareClick}>
      {value}
    </button>
  );
}

export default function Board() {
  const [squares, setSquares] = useState(Array(9).fill(null));

  function handleClick(i) {
    const nextSquares = squares.slice();
    nextSquares[i] = 'X';
    setSquares(nextSquares);
  }

  return (
    <>
      <div className="board-row">
        <Square value={squares[0]} onSquareClick={() => handleClick(0)} />
        <Square value={squares[1]} onSquareClick={() => handleClick(1)} />
        <Square value={squares[2]} onSquareClick={() => handleClick(2)} />
      </div>
      <div className="board-row">
        <Square value={squares[3]} onSquareClick={() => handleClick(3)} />
        <Square value={squares[4]} onSquareClick={() => handleClick(4)} />
        <Square value={squares[5]} onSquareClick={() => handleClick(5)} />
      </div>
      <div className="board-row">
        <Square value={squares[6]} onSquareClick={() => handleClick(6)} />
        <Square value={squares[7]} onSquareClick={() => handleClick(7)} />
        <Square value={squares[8]} onSquareClick={() => handleClick(8)} />
      </div>
    </>
  );
}
Now that your state handling is in the Board component, the parent Board component passes props to the child Square components so that they can be displayed correctly. When clicking on a Square, the child Square component now asks the parent Board component to update the state of the board. When the Board’s state changes, both the Board component and every child Square re-renders automatically. Keeping the state of all squares in the Board component will allow it to determine the winner in the future.
Let’s recap what happens when a user clicks the top left square on your board to add an X to it:
- Clicking on the upper left square runs the function that the
buttonreceived as itsonClickprop from theSquare. TheSquarecomponent received that function as itsonSquareClickprop from theBoard. TheBoardcomponent defined that function directly in the JSX. It callshandleClickwith an argument of0. handleClickuses the argument (0) to update the first element of thesquaresarray fromnulltoX.- The
squaresstate of theBoardcomponent was updated, so theBoardand all of its children re-render. This causes thevalueprop of theSquarecomponent with index0to change fromnulltoX.
In the end the user sees that the upper left square has changed from empty to having a X after clicking it.
Miksi muuttumattomuus on tärkeää
Note how in handleClick, you call .slice() to create a copy of the squares array instead of modifying the existing array. To explain why, we need to discuss immutability and why immutability is important to learn.
There are generally two approaches to changing data. The first approach is to mutate the data by directly changing the data’s values. The second approach is to replace the data with a new copy which has the desired changes. Here is what it would look like if you mutated the squares array:
const squares = [null, null, null, null, null, null, null, null, null];
squares[0] = 'X';
// Now `squares` is ["X", null, null, null, null, null, null, null, null];
And here is what it would look like if you changed data without mutating the squares array:
const squares = [null, null, null, null, null, null, null, null, null];
const nextSquares = ['X', null, null, null, null, null, null, null, null];
// Now `squares` is unchanged, but `nextSquares` first element is 'X' rather than `null`
The result is the same but by not mutating (changing the underlying data) directly, you gain several benefits.
Immutability makes complex features much easier to implement. Later in this tutorial, you will implement a “time travel” feature that lets you review the game’s history and “jump back” to past moves. This functionality isn’t specific to games—an ability to undo and redo certain actions is a common requirement for apps. Avoiding direct data mutation lets you keep previous versions of the data intact, and reuse them later.
There is also another benefit of immutability. By default, all child components re-render automatically when the state of a parent component changes. This includes even the child components that weren’t affected by the change. Although re-rendering is not by itself noticeable to the user (you shouldn’t actively try to avoid it!), you might want to skip re-rendering a part of the tree that clearly wasn’t affected by it for performance reasons. Immutability makes it very cheap for components to compare whether their data has changed or not. You can learn more about how React chooses when to re-render a component in the memo API reference.
Vuorojen ottaminen
It’s now time to fix a major defect in this tic-tac-toe game: the “O”s cannot be marked on the board.
You’ll set the first move to be “X” by default. Let’s keep track of this by adding another piece of state to the Board component:
function Board() {
  const [xIsNext, setXIsNext] = useState(true);
  const [squares, setSquares] = useState(Array(9).fill(null));

  // ...
}
Each time a player moves, xIsNext (a boolean) will be flipped to determine which player goes next and the game’s state will be saved. You’ll update the Board’s handleClick function to flip the value of xIsNext:
export default function Board() {
  const [xIsNext, setXIsNext] = useState(true);
  const [squares, setSquares] = useState(Array(9).fill(null));

  function handleClick(i) {
    const nextSquares = squares.slice();
    if (xIsNext) {
      nextSquares[i] = "X";
    } else {
      nextSquares[i] = "O";
    }
    setSquares(nextSquares);
    setXIsNext(!xIsNext);
  }

  return (
    //...
  );
}
Now, as you click on different squares, they will alternate between X and O, as they should!
But wait, there’s a problem. Try clicking on the same square multiple times:
The X is overwritten by an O! While this would add a very interesting twist to the game, we’re going to stick to the original rules for now.
When you mark a square with a X or an O you aren’t first checking to see if the square already has a X or O value. You can fix this by returning early. You’ll check to see if the square already has a X or an O. If the square is already filled, you will return in the handleClick function early—before it tries to update the board state.
function handleClick(i) {
  if (squares[i]) {
    return;
  }
  const nextSquares = squares.slice();
  //...
}
Now you can only add X’s or O’s to empty squares! Here is what your code should look like at this point:
import { useState } from 'react';

function Square({value, onSquareClick}) {
  return (
    <button className="square" onClick={onSquareClick}>
      {value}
    </button>
  );
}

export default function Board() {
  const [xIsNext, setXIsNext] = useState(true);
  const [squares, setSquares] = useState(Array(9).fill(null));

  function handleClick(i) {
    if (squares[i]) {
      return;
    }
    const nextSquares = squares.slice();
    if (xIsNext) {
      nextSquares[i] = 'X';
    } else {
      nextSquares[i] = 'O';
    }
    setSquares(nextSquares);
    setXIsNext(!xIsNext);
  }

  return (
    <>
      <div className="board-row">
        <Square value={squares[0]} onSquareClick={() => handleClick(0)} />
        <Square value={squares[1]} onSquareClick={() => handleClick(1)} />
        <Square value={squares[2]} onSquareClick={() => handleClick(2)} />
      </div>
      <div className="board-row">
        <Square value={squares[3]} onSquareClick={() => handleClick(3)} />
        <Square value={squares[4]} onSquareClick={() => handleClick(4)} />
        <Square value={squares[5]} onSquareClick={() => handleClick(5)} />
      </div>
      <div className="board-row">
        <Square value={squares[6]} onSquareClick={() => handleClick(6)} />
        <Square value={squares[7]} onSquareClick={() => handleClick(7)} />
        <Square value={squares[8]} onSquareClick={() => handleClick(8)} />
      </div>
    </>
  );
}
Voittajan päättäminen
Now that the players can take turns, you’ll want to show when the game is won and there are no more turns to make. To do this you’ll add a helper function called calculateWinner that takes an array of 9 squares, checks for a winner and returns 'X', 'O', or null as appropriate. Don’t worry too much about the calculateWinner function; it’s not specific to React:
export default function Board() {
  //...
}

function calculateWinner(squares) {
  const lines = [
    [0, 1, 2],
    [3, 4, 5],
    [6, 7, 8],
    [0, 3, 6],
    [1, 4, 7],
    [2, 5, 8],
    [0, 4, 8],
    [2, 4, 6]
  ];
  for (let i = 0; i < lines.length; i++) {
    const [a, b, c] = lines[i];
    if (squares[a] && squares[a] === squares[b] && squares[a] === squares[c]) {
      return squares[a];
    }
  }
  return null;
}You will call calculateWinner(squares) in the Board component’s handleClick function to check if a player has won. You can perform this check at the same time you check if a user has clicked a square that already has a X or and O. We’d like to return early in both cases:
function handleClick(i) {
  if (squares[i] || calculateWinner(squares)) {
    return;
  }
  const nextSquares = squares.slice();
  //...
}
To let the players know when the game is over, you can display text such as “Winner: X” or “Winner: O”. To do that you’ll add a status section to the Board component. The status will display the winner if the game is over and if the game is ongoing you’ll display which player’s turn is next:
export default function Board() {
  // ...
  const winner = calculateWinner(squares);
  let status;
  if (winner) {
    status = "Winner: " + winner;
  } else {
    status = "Next player: " + (xIsNext ? "X" : "O");
  }

  return (
    <>
      <div className="status">{status}</div>
      <div className="board-row">
        // ...
  )
}
Congratulations! You now have a working tic-tac-toe game. And you’ve just learned the basics of React too. So you are the real winner here. Here is what the code should look like:
import { useState } from 'react';

function Square({value, onSquareClick}) {
  return (
    <button className="square" onClick={onSquareClick}>
      {value}
    </button>
  );
}

export default function Board() {
  const [xIsNext, setXIsNext] = useState(true);
  const [squares, setSquares] = useState(Array(9).fill(null));

  function handleClick(i) {
    if (calculateWinner(squares) || squares[i]) {
      return;
    }
    const nextSquares = squares.slice();
    if (xIsNext) {
      nextSquares[i] = 'X';
    } else {
      nextSquares[i] = 'O';
    }
    setSquares(nextSquares);
    setXIsNext(!xIsNext);
  }

  const winner = calculateWinner(squares);
  let status;
  if (winner) {
    status = 'Winner: ' + winner;
  } else {
    status = 'Next player: ' + (xIsNext ? 'X' : 'O');
  }

  return (
    <>
      <div className="status">{status}</div>
      <div className="board-row">
        <Square value={squares[0]} onSquareClick={() => handleClick(0)} />
        <Square value={squares[1]} onSquareClick={() => handleClick(1)} />
        <Square value={squares[2]} onSquareClick={() => handleClick(2)} />
      </div>
      <div className="board-row">
        <Square value={squares[3]} onSquareClick={() => handleClick(3)} />
        <Square value={squares[4]} onSquareClick={() => handleClick(4)} />
        <Square value={squares[5]} onSquareClick={() => handleClick(5)} />
      </div>
      <div className="board-row">
        <Square value={squares[6]} onSquareClick={() => handleClick(6)} />
        <Square value={squares[7]} onSquareClick={() => handleClick(7)} />
        <Square value={squares[8]} onSquareClick={() => handleClick(8)} />
      </div>
    </>
  );
}

function calculateWinner(squares) {
  const lines = [
    [0, 1, 2],
    [3, 4, 5],
    [6, 7, 8],
    [0, 3, 6],
    [1, 4, 7],
    [2, 5, 8],
    [0, 4, 8],
    [2, 4, 6],
  ];
  for (let i = 0; i < lines.length; i++) {
    const [a, b, c] = lines[i];
    if (squares[a] && squares[a] === squares[b] && squares[a] === squares[c]) {
      return squares[a];
    }
  }
  return null;
}
Aikamatkustuksen lisääminen
As a final exercise, let’s make it possible to “go back in time” to the previous moves in the game.
Pelin siirtojen tallentaminen
If you mutated the squares array, implementing time travel would be very difficult.
However, you used slice() to create a new copy of the squares array after every move, and treated it as immutable. This will allow you to store every past version of the squares array, and navigate between the turns that have already happened.
You’ll store the past squares arrays in another array called history, which you’ll store as a new state variable. The history array represents all board states, from the first to the last move, and has a shape like this:
[
  // Before first move
  [null, null, null, null, null, null, null, null, null],
  // After first move
  [null, null, null, null, 'X', null, null, null, null],
  // After second move
  [null, null, null, null, 'X', null, null, null, 'O'],
  // ...
]
Tilan nostaminen ylös, uudestaan
You will now write a new top-level component called Game to display a list of past moves. That’s where you will place the history state that contains the entire game history.
Placing the history state into the Game component will let you remove the squares state from its child Board component. Just like you “lifted state up” from the Square component into the Board component, you will now lift it up from the Board into the top-level Game component. This gives the Game component full control over the Board’s data and lets it instruct the Board to render previous turns from the history.
First, add a Game component with export default. Have it render the Board component and some markup:
function Board() {
  // ...
}

export default function Game() {
  return (
    <div className="game">
      <div className="game-board">
        <Board />
      </div>
      <div className="game-info">
        <ol>{/*TODO*/}</ol>
      </div>
    </div>
  );
}
Note that you are removing the export default keywords before the function Board() { declaration and adding them before the function Game() { declaration. This tells your index.js file to use the Game component as the top-level component instead of your Board component. The additional divs returned by the Game component are making room for the game information you’ll add to the board later.
Add some state to the Game component to track which player is next and the history of moves:
export default function Game() {
  const [xIsNext, setXIsNext] = useState(true);
  const [history, setHistory] = useState([Array(9).fill(null)]);
  // ...
Notice how [Array(9).fill(null)] is an array with a single item, which itself is an array of 9 nulls.
To render the squares for the current move, you’ll want to read the last squares array from the history. You don’t need useState for this—you already have enough information to calculate it during rendering:
export default function Game() {
  const [xIsNext, setXIsNext] = useState(true);
  const [history, setHistory] = useState([Array(9).fill(null)]);
  const currentSquares = history[history.length - 1];
  // ...
Next, create a handlePlay function inside the Game component that will be called by the Board component to update the game. Pass xIsNext, currentSquares and handlePlay as props to the Board component:
export default function Game() {
  const [xIsNext, setXIsNext] = useState(true);
  const [history, setHistory] = useState([Array(9).fill(null)]);
  const currentSquares = history[history.length - 1];

  function handlePlay(nextSquares) {
    // TODO
  }

  return (
    <div className="game">
      <div className="game-board">
        <Board xIsNext={xIsNext} squares={currentSquares} onPlay={handlePlay} />
        //...
  )
}
Let’s make the Board component fully controlled by the props it receives. Change the Board component to take three props: xIsNext, squares, and a new onPlay function that Board can call with the updated squares array when a player makes a move. Next, remove the first two lines of the Board function that call useState:
function Board({ xIsNext, squares, onPlay }) {
  function handleClick(i) {
    //...
  }
  // ...
}
Now replace the setSquares and setXIsNext calls in handleClick in the Board component with a single call to your new onPlay function so the Game component can update the Board when the user clicks a square:
function Board({ xIsNext, squares, onPlay }) {
  function handleClick(i) {
    if (calculateWinner(squares) || squares[i]) {
      return;
    }
    const nextSquares = squares.slice();
    if (xIsNext) {
      nextSquares[i] = "X";
    } else {
      nextSquares[i] = "O";
    }
    onPlay(nextSquares);
  }
  //...
}
The Board component is fully controlled by the props passed to it by the Game component. You need to implement the handlePlay function in the Game component to get the game working again.
What should handlePlay do when called? Remember that Board used to call setSquares with an updated array; now it passes the updated squares array to onPlay.
The handlePlay function needs to update Game’s state to trigger a re-render, but you don’t have a setSquares function that you can call any more—you’re now using the history state variable to store this information. You’ll want to update history by appending the updated squares array as a new history entry. You also want to toggle xIsNext, just as Board used to do:
export default function Game() {
  //...
  function handlePlay(nextSquares) {
    setHistory([...history, nextSquares]);
    setXIsNext(!xIsNext);
  }
  //...
}
Here, [...history, nextSquares] creates a new array that contains all the items in history, followed by nextSquares. (You can read the ...history spread syntax as “enumerate all the items in history”.)
For example, if history is [[null,null,null], ["X",null,null]] and nextSquares is ["X",null,"O"], then the new [...history, nextSquares] array will be [[null,null,null], ["X",null,null], ["X",null,"O"]].
At this point, you’ve moved the state to live in the Game component, and the UI should be fully working, just as it was before the refactor. Here is what the code should look like at this point:
import { useState } from 'react';

function Square({ value, onSquareClick }) {
  return (
    <button className="square" onClick={onSquareClick}>
      {value}
    </button>
  );
}

function Board({ xIsNext, squares, onPlay }) {
  function handleClick(i) {
    if (calculateWinner(squares) || squares[i]) {
      return;
    }
    const nextSquares = squares.slice();
    if (xIsNext) {
      nextSquares[i] = 'X';
    } else {
      nextSquares[i] = 'O';
    }
    onPlay(nextSquares);
  }

  const winner = calculateWinner(squares);
  let status;
  if (winner) {
    status = 'Winner: ' + winner;
  } else {
    status = 'Next player: ' + (xIsNext ? 'X' : 'O');
  }

  return (
    <>
      <div className="status">{status}</div>
      <div className="board-row">
        <Square value={squares[0]} onSquareClick={() => handleClick(0)} />
        <Square value={squares[1]} onSquareClick={() => handleClick(1)} />
        <Square value={squares[2]} onSquareClick={() => handleClick(2)} />
      </div>
      <div className="board-row">
        <Square value={squares[3]} onSquareClick={() => handleClick(3)} />
        <Square value={squares[4]} onSquareClick={() => handleClick(4)} />
        <Square value={squares[5]} onSquareClick={() => handleClick(5)} />
      </div>
      <div className="board-row">
        <Square value={squares[6]} onSquareClick={() => handleClick(6)} />
        <Square value={squares[7]} onSquareClick={() => handleClick(7)} />
        <Square value={squares[8]} onSquareClick={() => handleClick(8)} />
      </div>
    </>
  );
}

export default function Game() {
  const [xIsNext, setXIsNext] = useState(true);
  const [history, setHistory] = useState([Array(9).fill(null)]);
  const currentSquares = history[history.length - 1];

  function handlePlay(nextSquares) {
    setHistory([...history, nextSquares]);
    setXIsNext(!xIsNext);
  }

  return (
    <div className="game">
      <div className="game-board">
        <Board xIsNext={xIsNext} squares={currentSquares} onPlay={handlePlay} />
      </div>
      <div className="game-info">
        <ol>{/*TODO*/}</ol>
      </div>
    </div>
  );
}

function calculateWinner(squares) {
  const lines = [
    [0, 1, 2],
    [3, 4, 5],
    [6, 7, 8],
    [0, 3, 6],
    [1, 4, 7],
    [2, 5, 8],
    [0, 4, 8],
    [2, 4, 6],
  ];
  for (let i = 0; i < lines.length; i++) {
    const [a, b, c] = lines[i];
    if (squares[a] && squares[a] === squares[b] && squares[a] === squares[c]) {
      return squares[a];
    }
  }
  return null;
}
Aikaisempien liikkeiden näyttäminen
Since you are recording the tic-tac-toe game’s history, you can now display a list of past moves to the player.
React elements like <button> are regular JavaScript objects; you can pass them around in your application. To render multiple items in React, you can use an array of React elements.
You already have an array of history moves in state, so now you need to transform it to an array of React elements. In JavaScript, to transform one array into another, you can use the array map method:
[1, 2, 3].map((x) => x * 2) // [2, 4, 6]You’ll use map to transform your history of moves into React elements representing buttons on the screen, and display a list of buttons to “jump” to past moves. Let’s map over the history in the Game component:
export default function Game() {
  const [xIsNext, setXIsNext] = useState(true);
  const [history, setHistory] = useState([Array(9).fill(null)]);
  const currentSquares = history[history.length - 1];

  function handlePlay(nextSquares) {
    setHistory([...history, nextSquares]);
    setXIsNext(!xIsNext);
  }

  function jumpTo(nextMove) {
    // TODO
  }

  const moves = history.map((squares, move) => {
    let description;
    if (move > 0) {
      description = 'Go to move #' + move;
    } else {
      description = 'Go to game start';
    }
    return (
      <li>
        <button onClick={() => jumpTo(move)}>{description}</button>
      </li>
    );
  });

  return (
    <div className="game">
      <div className="game-board">
        <Board xIsNext={xIsNext} squares={currentSquares} onPlay={handlePlay} />
      </div>
      <div className="game-info">
        <ol>{moves}</ol>
      </div>
    </div>
  );
}
You can see what your code should look like below. Note that you should see an error in the developer tools console that says: Warning: Each child in an array or iterator should have a unique "key" prop. Check the render method of `Game`. You’ll fix this error in the next section.
import { useState } from 'react';

function Square({ value, onSquareClick }) {
  return (
    <button className="square" onClick={onSquareClick}>
      {value}
    </button>
  );
}

function Board({ xIsNext, squares, onPlay }) {
  function handleClick(i) {
    if (calculateWinner(squares) || squares[i]) {
      return;
    }
    const nextSquares = squares.slice();
    if (xIsNext) {
      nextSquares[i] = 'X';
    } else {
      nextSquares[i] = 'O';
    }
    onPlay(nextSquares);
  }

  const winner = calculateWinner(squares);
  let status;
  if (winner) {
    status = 'Winner: ' + winner;
  } else {
    status = 'Next player: ' + (xIsNext ? 'X' : 'O');
  }

  return (
    <>
      <div className="status">{status}</div>
      <div className="board-row">
        <Square value={squares[0]} onSquareClick={() => handleClick(0)} />
        <Square value={squares[1]} onSquareClick={() => handleClick(1)} />
        <Square value={squares[2]} onSquareClick={() => handleClick(2)} />
      </div>
      <div className="board-row">
        <Square value={squares[3]} onSquareClick={() => handleClick(3)} />
        <Square value={squares[4]} onSquareClick={() => handleClick(4)} />
        <Square value={squares[5]} onSquareClick={() => handleClick(5)} />
      </div>
      <div className="board-row">
        <Square value={squares[6]} onSquareClick={() => handleClick(6)} />
        <Square value={squares[7]} onSquareClick={() => handleClick(7)} />
        <Square value={squares[8]} onSquareClick={() => handleClick(8)} />
      </div>
    </>
  );
}

export default function Game() {
  const [xIsNext, setXIsNext] = useState(true);
  const [history, setHistory] = useState([Array(9).fill(null)]);
  const currentSquares = history[history.length - 1];

  function handlePlay(nextSquares) {
    setHistory([...history, nextSquares]);
    setXIsNext(!xIsNext);
  }

  function jumpTo(nextMove) {
    // TODO
  }

  const moves = history.map((squares, move) => {
    let description;
    if (move > 0) {
      description = 'Go to move #' + move;
    } else {
      description = 'Go to game start';
    }
    return (
      <li>
        <button onClick={() => jumpTo(move)}>{description}</button>
      </li>
    );
  });

  return (
    <div className="game">
      <div className="game-board">
        <Board xIsNext={xIsNext} squares={currentSquares} onPlay={handlePlay} />
      </div>
      <div className="game-info">
        <ol>{moves}</ol>
      </div>
    </div>
  );
}

function calculateWinner(squares) {
  const lines = [
    [0, 1, 2],
    [3, 4, 5],
    [6, 7, 8],
    [0, 3, 6],
    [1, 4, 7],
    [2, 5, 8],
    [0, 4, 8],
    [2, 4, 6],
  ];
  for (let i = 0; i < lines.length; i++) {
    const [a, b, c] = lines[i];
    if (squares[a] && squares[a] === squares[b] && squares[a] === squares[c]) {
      return squares[a];
    }
  }
  return null;
}
As you iterate through history array inside the function you passed to map, the squares argument goes through each element of history, and the move argument goes through each array index: 0, 1, 2, …. (In most cases, you’d need the actual array elements, but to render a list of moves you will only need indexes.)
For each move in the tic-tac-toe game’s history, you create a list item <li> which contains a button <button>. The button has an onClick handler which calls a function called jumpTo (that you haven’t implemented yet).
For now, you should see a list of the moves that occurred in the game and an error in the developer tools console. Let’s discuss what the “key” error means.
Avaimen valinta
When you render a list, React stores some information about each rendered list item. When you update a list, React needs to determine what has changed. You could have added, removed, re-arranged, or updated the list’s items.
Imagine transitioning from
<li>Alexa: 7 tasks left</li>
<li>Ben: 5 tasks left</li>
to
<li>Ben: 9 tasks left</li>
<li>Claudia: 8 tasks left</li>
<li>Alexa: 5 tasks left</li>
In addition to the updated counts, a human reading this would probably say that you swapped Alexa and Ben’s ordering and inserted Claudia between Alexa and Ben. However, React is a computer program and can’t know what you intended, so you need to specify a key property for each list item to differentiate each list item from its siblings. If your data was from a database, Alexa, Ben, and Claudia’s database IDs could be used as keys.
<li key={user.id}>
  {user.name}: {user.taskCount} tasks left
</li>
When a list is re-rendered, React takes each list item’s key and searches the previous list’s items for a matching key. If the current list has a key that didn’t exist before, React creates a component. If the current list is missing a key that existed in the previous list, React destroys the previous component. If two keys match, the corresponding component is moved.
Keys tell React about the identity of each component, which allows React to maintain state between re-renders. If a component’s key changes, the component will be destroyed and re-created with a new state.
key is a special and reserved property in React. When an element is created, React extracts the key property and stores the key directly on the returned element. Even though key may look like it is passed as props, React automatically uses key to decide which components to update. There’s no way for a component to ask what key its parent specified.
It’s strongly recommended that you assign proper keys whenever you build dynamic lists. If you don’t have an appropriate key, you may want to consider restructuring your data so that you do.
If no key is specified, React will report an error and use the array index as a key by default. Using the array index as a key is problematic when trying to re-order a list’s items or inserting/removing list items. Explicitly passing key={i} silences the error but has the same problems as array indices and is not recommended in most cases.
Keys do not need to be globally unique; they only need to be unique between components and their siblings.
Aikamatkustuksen toteutus
In the tic-tac-toe game’s history, each past move has a unique ID associated with it: it’s the sequential number of the move. Moves will never be re-ordered, deleted, or inserted in the middle, so it’s safe to use the move index as a key.
In the Game function, you can add the key as <li key={move}>, and if you reload the rendered game, React’s “key” error should disappear:
const moves = history.map((squares, move) => {
  //...
  return (
    <li key={move}>
      <button onClick={() => jumpTo(move)}>{description}</button>
    </li>
  );
});import { useState } from 'react'; function Square({ value, onSquareClick }) { return ( <button className="square" onClick={onSquareClick}> {value} </button> ); } function Board({ xIsNext, squares, onPlay }) { function handleClick(i) { if (calculateWinner(squares) || squares[i]) { return; } const nextSquares = squares.slice(); if (xIsNext) { nextSquares[i] = 'X'; } else { nextSquares[i] = 'O'; } onPlay(nextSquares); } const winner = calculateWinner(squares); let status; if (winner) { status = 'Winner: ' + winner; } else { status = 'Next player: ' + (xIsNext ? 'X' : 'O'); } return ( <> <div className="status">{status}</div> <div className="board-row"> <Square value={squares[0]} onSquareClick={() => handleClick(0)} /> <Square value={squares[1]} onSquareClick={() => handleClick(1)} /> <Square value={squares[2]} onSquareClick={() => handleClick(2)} /> </div> <div className="board-row"> <Square value={squares[3]} onSquareClick={() => handleClick(3)} /> <Square value={squares[4]} onSquareClick={() => handleClick(4)} /> <Square value={squares[5]} onSquareClick={() => handleClick(5)} /> </div> <div className="board-row"> <Square value={squares[6]} onSquareClick={() => handleClick(6)} /> <Square value={squares[7]} onSquareClick={() => handleClick(7)} /> <Square value={squares[8]} onSquareClick={() => handleClick(8)} /> </div> </> ); } export default function Game() { const [xIsNext, setXIsNext] = useState(true); const [history, setHistory] = useState([Array(9).fill(null)]); const currentSquares = history[history.length - 1]; function handlePlay(nextSquares) { setHistory([...history, nextSquares]); setXIsNext(!xIsNext); } function jumpTo(nextMove) { // TODO } const moves = history.map((squares, move) => { let description; if (move > 0) { description = 'Go to move #' + move; } else { description = 'Go to game start'; } return ( <li key={move}> <button onClick={() => jumpTo(move)}>{description}</button> </li> ); }); return ( <div className="game"> <div className="game-board"> <Board xIsNext={xIsNext} squares={currentSquares} onPlay={handlePlay} /> </div> <div className="game-info"> <ol>{moves}</ol> </div> </div> ); } function calculateWinner(squares) { const lines = [ [0, 1, 2], [3, 4, 5], [6, 7, 8], [0, 3, 6], [1, 4, 7], [2, 5, 8], [0, 4, 8], [2, 4, 6], ]; for (let i = 0; i < lines.length; i++) { const [a, b, c] = lines[i]; if (squares[a] && squares[a] === squares[b] && squares[a] === squares[c]) { return squares[a]; } } return null; }
Before you can implement jumpTo, you need the Game component to keep track of which step the user is currently viewing. To do this, define a new state variable called currentMove, defaulting to 0:
export default function Game() {
  const [xIsNext, setXIsNext] = useState(true);
  const [history, setHistory] = useState([Array(9).fill(null)]);
  const [currentMove, setCurrentMove] = useState(0);
  const currentSquares = history[history.length - 1];
  //...
}
Next, update the jumpTo function inside Game to update that currentMove. You’ll also set xIsNext to true if the number that you’re changing currentMove to is even.
export default function Game() {
  // ...
  function jumpTo(nextMove) {
    setCurrentMove(nextMove);
    setXIsNext(nextMove % 2 === 0);
  }
  //...
}
You will now make two changes to the Game’s handlePlay function which is called when you click on a square.
- If you “go back in time” and then make a new move from that point, you only want to keep the history up to that point. Instead of adding
nextSquaresafter all items (...spread syntax) inhistory, you’ll add it after all items inhistory.slice(0, currentMove + 1)so that you’re only keeping that portion of the old history. - Each time a move is made, you need to update
currentMoveto point to the latest history entry.
function handlePlay(nextSquares) {
  const nextHistory = [...history.slice(0, currentMove + 1), nextSquares];
  setHistory(nextHistory);
  setCurrentMove(nextHistory.length - 1);
  setXIsNext(!xIsNext);
}
Finally, you will modify the Game component to render the currently selected move, instead of always rendering the final move:
export default function Game() {
  const [xIsNext, setXIsNext] = useState(true);
  const [history, setHistory] = useState([Array(9).fill(null)]);
  const [currentMove, setCurrentMove] = useState(0);
  const currentSquares = history[currentMove];

  // ...
}
If you click on any step in the game’s history, the tic-tac-toe board should immediately update to show what the board looked like after that step occurred.
import { useState } from 'react';

function Square({value, onSquareClick}) {
  return (
    <button className="square" onClick={onSquareClick}>
      {value}
    </button>
  );
}

function Board({ xIsNext, squares, onPlay }) {
  function handleClick(i) {
    if (calculateWinner(squares) || squares[i]) {
      return;
    }
    const nextSquares = squares.slice();
    if (xIsNext) {
      nextSquares[i] = 'X';
    } else {
      nextSquares[i] = 'O';
    }
    onPlay(nextSquares);
  }

  const winner = calculateWinner(squares);
  let status;
  if (winner) {
    status = 'Winner: ' + winner;
  } else {
    status = 'Next player: ' + (xIsNext ? 'X' : 'O');
  }

  return (
    <>
      <div className="status">{status}</div>
      <div className="board-row">
        <Square value={squares[0]} onSquareClick={() => handleClick(0)} />
        <Square value={squares[1]} onSquareClick={() => handleClick(1)} />
        <Square value={squares[2]} onSquareClick={() => handleClick(2)} />
      </div>
      <div className="board-row">
        <Square value={squares[3]} onSquareClick={() => handleClick(3)} />
        <Square value={squares[4]} onSquareClick={() => handleClick(4)} />
        <Square value={squares[5]} onSquareClick={() => handleClick(5)} />
      </div>
      <div className="board-row">
        <Square value={squares[6]} onSquareClick={() => handleClick(6)} />
        <Square value={squares[7]} onSquareClick={() => handleClick(7)} />
        <Square value={squares[8]} onSquareClick={() => handleClick(8)} />
      </div>
    </>
  );
}

export default function Game() {
  const [xIsNext, setXIsNext] = useState(true);
  const [history, setHistory] = useState([Array(9).fill(null)]);
  const [currentMove, setCurrentMove] = useState(0);
  const currentSquares = history[currentMove];

  function handlePlay(nextSquares) {
    const nextHistory = [...history.slice(0, currentMove + 1), nextSquares];
    setHistory(nextHistory);
    setCurrentMove(nextHistory.length - 1);
    setXIsNext(!xIsNext);
  }

  function jumpTo(nextMove) {
    setCurrentMove(nextMove);
    setXIsNext(nextMove % 2 === 0);
  }

  const moves = history.map((squares, move) => {
    let description;
    if (move > 0) {
      description = 'Go to move #' + move;
    } else {
      description = 'Go to game start';
    }
    return (
      <li key={move}>
        <button onClick={() => jumpTo(move)}>{description}</button>
      </li>
    );
  });

  return (
    <div className="game">
      <div className="game-board">
        <Board xIsNext={xIsNext} squares={currentSquares} onPlay={handlePlay} />
      </div>
      <div className="game-info">
        <ol>{moves}</ol>
      </div>
    </div>
  );
}

function calculateWinner(squares) {
  const lines = [
    [0, 1, 2],
    [3, 4, 5],
    [6, 7, 8],
    [0, 3, 6],
    [1, 4, 7],
    [2, 5, 8],
    [0, 4, 8],
    [2, 4, 6],
  ];
  for (let i = 0; i < lines.length; i++) {
    const [a, b, c] = lines[i];
    if (squares[a] && squares[a] === squares[b] && squares[a] === squares[c]) {
      return squares[a];
    }
  }
  return null;
}
Loppusiivous
If you look at the code very closely, you may notice that xIsNext === true when currentMove is even and xIsNext === false when currentMove is odd. In other words, if you know the value of currentMove, then you can always figure out what xIsNext should be.
There’s no reason for you to store both of these in state. In fact, always try to avoid redundant state. Simplifying what you store in state reduces bugs and makes your code easier to understand. Change Game so that it doesn’t store xIsNext as a separate state variable and instead figures it out based on the currentMove:
export default function Game() {
  const [history, setHistory] = useState([Array(9).fill(null)]);
  const [currentMove, setCurrentMove] = useState(0);
  const xIsNext = currentMove % 2 === 0;
  const currentSquares = history[currentMove];

  function handlePlay(nextSquares) {
    const nextHistory = [...history.slice(0, currentMove + 1), nextSquares];
    setHistory(nextHistory);
    setCurrentMove(nextHistory.length - 1);
  }

  function jumpTo(nextMove) {
    setCurrentMove(nextMove);
  }
  // ...
}
You no longer need the xIsNext state declaration or the calls to setXIsNext. Now, there’s no chance for xIsNext to get out of sync with currentMove, even if you make a mistake while coding the components.
Lopetus
Congratulations! You’ve created a tic-tac-toe game that:
- Lets you play tic-tac-toe,
- Indicates when a player has won the game,
- Stores a game’s history as a game progresses,
- Allows players to review a game’s history and see previous versions of a game’s board.
Nice work! We hope you now feel like you have a decent grasp of how React works.
Check out the final result here:
import { useState } from 'react';

function Square({ value, onSquareClick }) {
  return (
    <button className="square" onClick={onSquareClick}>
      {value}
    </button>
  );
}

function Board({ xIsNext, squares, onPlay }) {
  function handleClick(i) {
    if (calculateWinner(squares) || squares[i]) {
      return;
    }
    const nextSquares = squares.slice();
    if (xIsNext) {
      nextSquares[i] = 'X';
    } else {
      nextSquares[i] = 'O';
    }
    onPlay(nextSquares);
  }

  const winner = calculateWinner(squares);
  let status;
  if (winner) {
    status = 'Winner: ' + winner;
  } else {
    status = 'Next player: ' + (xIsNext ? 'X' : 'O');
  }

  return (
    <>
      <div className="status">{status}</div>
      <div className="board-row">
        <Square value={squares[0]} onSquareClick={() => handleClick(0)} />
        <Square value={squares[1]} onSquareClick={() => handleClick(1)} />
        <Square value={squares[2]} onSquareClick={() => handleClick(2)} />
      </div>
      <div className="board-row">
        <Square value={squares[3]} onSquareClick={() => handleClick(3)} />
        <Square value={squares[4]} onSquareClick={() => handleClick(4)} />
        <Square value={squares[5]} onSquareClick={() => handleClick(5)} />
      </div>
      <div className="board-row">
        <Square value={squares[6]} onSquareClick={() => handleClick(6)} />
        <Square value={squares[7]} onSquareClick={() => handleClick(7)} />
        <Square value={squares[8]} onSquareClick={() => handleClick(8)} />
      </div>
    </>
  );
}

export default function Game() {
  const [history, setHistory] = useState([Array(9).fill(null)]);
  const [currentMove, setCurrentMove] = useState(0);
  const xIsNext = currentMove % 2 === 0;
  const currentSquares = history[currentMove];

  function handlePlay(nextSquares) {
    const nextHistory = [...history.slice(0, currentMove + 1), nextSquares];
    setHistory(nextHistory);
    setCurrentMove(nextHistory.length - 1);
  }

  function jumpTo(nextMove) {
    setCurrentMove(nextMove);
  }

  const moves = history.map((squares, move) => {
    let description;
    if (move > 0) {
      description = 'Go to move #' + move;
    } else {
      description = 'Go to game start';
    }
    return (
      <li key={move}>
        <button onClick={() => jumpTo(move)}>{description}</button>
      </li>
    );
  });

  return (
    <div className="game">
      <div className="game-board">
        <Board xIsNext={xIsNext} squares={currentSquares} onPlay={handlePlay} />
      </div>
      <div className="game-info">
        <ol>{moves}</ol>
      </div>
    </div>
  );
}

function calculateWinner(squares) {
  const lines = [
    [0, 1, 2],
    [3, 4, 5],
    [6, 7, 8],
    [0, 3, 6],
    [1, 4, 7],
    [2, 5, 8],
    [0, 4, 8],
    [2, 4, 6],
  ];
  for (let i = 0; i < lines.length; i++) {
    const [a, b, c] = lines[i];
    if (squares[a] && squares[a] === squares[b] && squares[a] === squares[c]) {
      return squares[a];
    }
  }
  return null;
}
If you have extra time or want to practice your new React skills, here are some ideas for improvements that you could make to the tic-tac-toe game, listed in order of increasing difficulty:
- For the current move only, show “You are at move #…” instead of a button.
- Rewrite
Boardto use two loops to make the squares instead of hardcoding them. - Add a toggle button that lets you sort the moves in either ascending or descending order.
- When someone wins, highlight the three squares that caused the win (and when no one wins, display a message about the result being a draw).
- Display the location for each move in the format (row, col) in the move history list.
Throughout this tutorial, you’ve touched on React concepts including elements, components, props, and state. Now that you’ve seen how these concepts work when building a game, check out Thinking in React to see how the same React concepts work when build an app’s UI.